Showing posts with label stamplorations. Show all posts

Thursday, November 18, 2021

Throwback Thursday

 Hello everyone, happy Thursday!!!

 This is the last post as a guest designer for Throwback Thursday! I made three cards for share with you colorful stencil background cards. 

I inspired talented and fantastic card designer Maria. Inspired by beautiful flowers and colorful blending, I made these cards.

Here is the inspired card. The specific card I've selected is one of she created for Inspiration project. You can see detail here.

The Throwback card


Ready to see how Maria inspired me?

Project 1

I choose a digital image from Fluttery Garden A2 Card Fronts - set of 6 and used Page from my laptop to open and resize the image. I edited and printed it and colored with Copic markers and Prisma color pencils. I blended with Honeycomb Delight stencil and wilted violet, spiced marmalade, festive berries Distress Oxide inks.


wilted violet, spiced marmalade, festive berries Distress Oxide inks
Memento Tuxedo black ink

Project 2

After printing and coloring in the same way as the previous card, and I fussy cut them with my Cutter Bee scissors. I blended the background with Shutters stencil and speckled egg, milled lavender, twisted citron Distress Oxide inks. For the sentiment, I die cut using Beautiful Word die and a black card stock.


Shutters stencil
speckled egg, milled lavender, twisted citron Distress Oxide inks


Project 3

I choose a beautiful flower image from Framed blooms #1 - set of 12 digital stamp and print it. I colored them and fussy cut the flowers. For the background, I blended on a white card stock using rubber bands stencil and spun sugar, fossilized amber, cracked pistachio Distress Oxide inks. I die cut a black card stock with Big Hugs Phrase die and adhere the sentiment using a glue pen.


spun sugar, fossilized amber, cracked pistachio Distress Oxide inks

The beautiful flowers and background stamping makes fun. Thanks to Maria for great inspiring me. 
Thank you so much for stopping by and have a wonderful day!!!

Thursday, October 14, 2021

Throwback Thursday

Hello everyone, happy Thursday!!!

 I am so happy to make cards as a guest desinger for Throwback Thursday! I made three cards using stamping background. 

I inspired talented card designer Karola. I was inspired by her background stamping. I made a background using the same stamp or stamp set such as the main image.

Here is the inspired card. The specific card I've selected is one of she created for Inspiration project. You can see detail here.

The Throwback card

Ready to see how Karola inspired me?

Project 1

I cut the kraft card stock 4"x5.25"size and stamped the Christmas ornaments using Christmas baubles stamp and London Fog Memento ink. I stamped an ornament on a white card stock and colored it with Copic markers. I cut it and added glossy accents. After being completely dry, I connected the owner with a silver string.


Glossy Accents
Memento London Fog ink
Memento Tuxedo Black ink
Vesramark watermark stamp pad
Ranger white embossing powder


Project 2

I prepared a kraft card stock in the same way as the first card, and I stamped the background four times using a stamp platform to match the four corners. I used Copic markers to color the Carnations and I fussy cut them with my Cutter Bee scissors. I attached the cut carnations on the background.


Memento London Fog ink
Memento Tuxedo Black ink
Vesramark watermark stamp pad
Ranger white embossing powder


Project 3

I stamped the blue flowers from Blossom Sprays #4 stamp on a white card stock and I colored it blue and green Copic markers. In the process of cutting, I cut out the surrounding backgrounds and cut only the flower part. I stamped the sentiment from So loved stamp set on a white card stock.


Memento London Fog ink
Memento Tuxedo Black ink


I think the stamps of the Stamplorations are beautiful and go well with both the background design and the main design. It was so much fun to create cards inspired by Karola .Thanks to Karola for great inspiring me.
Thank you so much for stopping by and have a wonderful day!!!


Thursday, September 16, 2021

Throwback Thursday!

 Hello everyone, happy Thursday!!!

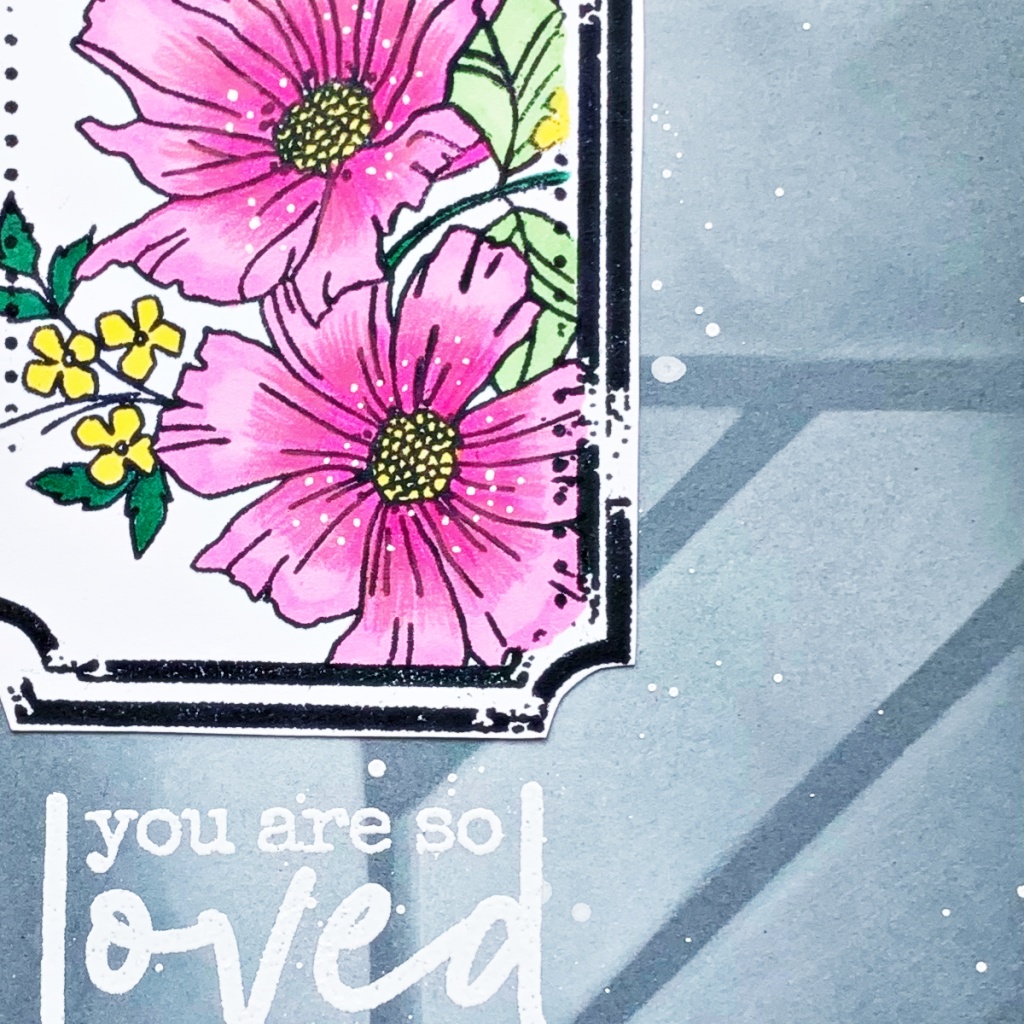
 I am so excited and happy to be a guest designer for Throwback Thursday! I have three cards for share with you colorful stencil background cards. 

I inspired talented and fantastic card designer Deepti Marik. I was inspired by her white blending on a gray card stock. Instead of the flower tag, I used a frame.

Here is the inspired card. The specific card I've selected is one of she created for Inspiration project. You can see detail here.


The Throwback card

Ready to see how Deepti inspired me?

Project 1

I blended with picket fence Distress ink on the gray card stock and I added some white ink splatters all over the panel.


picket fence distress ink


Project 2

I stamped the frame from Floral Bliss stamp and I stamped the same frame on a post-it for masking technique. I cut the frame from the post-it and put on the stamped frame. I stamped the Carnations from Blooms Sprays #5 stamp on the frame stamping and remove the post-it.  And I colored the carnations with Copic markers and Prisma color pencils. I cut the frame and adhere on the card front using double-sided tape.


Project 3

For the sentiments, I stamped with So loved stamp and embossing ink, and I did white heat embossing. Lastly I added some white dots with a white gel pen. 


I thought that the achromatic background makes the bright flowers stand out more. It was so much fun to create a piece of art inspired by Deepti.Thanks to Deepti for great inspiring me.
Thank you so much for stopping by and have a wonderful day!!!

Thursday, April 22, 2021

Throwback Thursday

 Hello everyone, happy Thursday!!!

This is the last post as a guest designer for Throwback Thursday. I have three cards for share with you random stamping background cards. 

I inspired talented and creative card designer Maria Fischer. I was inspired by her creative cards, and decided to use random stamping technique on my cards.

Here is the inspired card. The specific card I've selected is one of she created for Spotlight project. You can see detail here.


The Throwback card

Here is my three projects :

Project 1

I stamped the sentimet on the center of the card stock with Beautiful you clear stamp and I stamped randomly with Bloom doodles clear stamp. I stamped hearts from Big Dreamer clear stamp for the empty spaces and colored the flowers and hearts with Copic markers. Lastly, I blended the edges with speckled egg Distress Oxide ink using a mini blending tool.


speckled egg Distress Oxide ink


Project 2

I stamped the sentiment and randomly the coffee, donuts and hearts on the white card stock.
I colored with Copic markers and added some white dots using a white Gel pen. The bag containing the coffee bean was stamped and pasted on kraft paper for the paper piercing technique. I blended the edges with milled lavender Distress Oxide ink using a mini blending tool.


Noteworthy3 clear stamp
milled lavender Distress Oxide ink


Project 3

I stamped the sentiment on the center of the white card stock and stamped flowers and hearts as shown. I colored with Copic markers and added some white dots using a gel pen. I blended the edges with spun sugar Distress Oxide ink.


spun sugar Distress Oxide ink

Random stamping technique is one of my favorite. I love filling paper with stamping and the process of stamping is very fun. Thanks to Maria Fischer for wonderful inspiring me.
Thank you so much for stopping by and have a wonderful day!!!

Shery is offering a $15 gift code to one lucky winner who will be drawn from all comments left on the Throwback Thursday post for the month, as well as from my post, here.


Thursday, March 25, 2021

Throwback Thursday

 Hello everyone, This is Gloria! I'm so excited and happy to be a guest designer for Throwback Thursday. I want to share with you three stamped background cards.

I inspired unique and gorgeous card designer Shirley Bampton.  I inspired by her funky and modern card and decided to make my own background by stamping. 

Here is the inspired card. The specific card I selected that is one of her create for Spotlight project. You can see detail here.


The Throwback card.
Ready to see how Shirley Bampton inspired me?

Project #1

I stamped the card front all over with a stamp from the ART MARK2 clear stamp set and London fog Memento ink. I used Page from my laptop to open and resize the Framed Blooms #1 digital stamps digital stamp file. I edited and printed the images.


London Fog Memento ink
Vintage photo Distress ink


Project #2

I stamped the card front all over with a stamp from the ART MARK2 clear stamp set and four colors Distress inks. For the sentiment, I die cut the sentiment twice on the brown card stock, and adhere them with glue pen.

stormy sky, mermaid lagoon, bundled sage, evergreen bough Distress inks
vintage photo Distress ink

Project #3

I stamped the card front all over with a stamp from the ART MARK2 clear stamp set and Tuxedo black Memento ink. For the flower part, I colored the them with Copic markers and Prisma color pencils and blended the edges with a vintage photo Distress ink.


vintage photo Distress ink


The background stamping makes unique and fun designs. Thanks to Shirley Bampton for great inspiring me. 
Thank you so much for stopping by and have a wonderful day!!!

Shery is offering a $15 gift code to one lucky winner who will be drawn from all comments left on the Throwback Thursday post for the month, as well as from my post, here.


Thursday, February 25, 2021

Throwback Thursday

Hello everyone!

Happy Thursday!!!

 I am so excited and happy to be a guest designer for Throwback Thursday! I have three cards for share with you colorful stencil background cards. 

I inspired talented and fantastic card designer Deepti Marik. I was inspired by her colorful cards, and decided to use ghosting techniques on my cards.

Here is the inspired card. The specific card I've selected is one of she created for Spotlight project. You can see detail here.

The Throwback card

Ready to see how Deepti inspired me?

Project 1

I blended with bright Distress Oxide inks on the white card stock and I used a mini mister to spray water on the stencil and laid it on the inked panel.

Honeycomb delight stencil
Bloom doodles clear stamp
Thanks chipboard
wilted violet, milled lavender, fossilized amber Distress Oxide inks


Project 2

I stamped with the Bloom doodles clear stamp on a white card stock and fussy cut them. I didn't color the stamping flowers because the background was gorgeous.

blueprint sketch, salty ocean, peacock feathers, twisted citron Distress Oxide inks

Project #3

I die cut the sentiment with Beautiful word die and black card stock.
I used the ghosting technique, on three cards.

festive berries, spun sugar, picked raspberry Distress Oxide inks

The beautiful stencil designs and the bright colors of the Distress Oxide inks matched, making great designs. Thanks to Deepti for great inspiring me.
Thank you so much for stopping by and have a wonderful day!!!

Shery is offering a $15 gift code to one lucky winner who will be drawn from all comments left on the Throwback Thursday post for the month, as well as from my post, here.

Sunday, September 27, 2020

Stencil Sunday

 Hello crafty friends! Happy Sunday! Gloria Here and This is my last posting Stencil Sunday's ARTplorations stencils. For three months, I had a great time with stencils, and I am deeply grateful for this opportunity.

Today, I made cards with techniques that match each of the three stencils.

Card 1 
Picked raspberry, spiced marmalade, fossilized amber distress inks,

The stencil was placed on a thick card stock using masking tape, And I set the part to be colored using a masking tape and blended using mini blending tools. After the blending was over, I was dropped to all over the panel.


Card 2
Kuretake watercolors

After preparing a designer paper for the background, put the stencil on it and attach masking tape to each edge. Then, draw hearts with a pencil and colored it with pink and orange watercolors using watercolor brushes. 


Card 3
pecock feathers, salty ocean Distress Oxide inks 
mermaid lagoon, chipped sapphire, bundled sage Distress inks

I blended on a 4.25" x 5.5" size white card stock with brick wall stencil and bundled sage Distress ink. I blended on a watercolor paper with 4 colors Distress inks and die cut it with Crazy double running stitch rectangle nesting die. Place the stencil on the inked paper and press it with baby wipes.


Today, I made cards with stencils using 3-color blending, watercolor, and baby wipe techniques.
I hope you enjoy this posting too.
Thank you so much for stopping by and have a wonderful day! 
Happy crafting! 

Sunday, August 23, 2020

Blending cards with stencils and two color inks

Hello everyone! This is Gloria. I am so excited and happy to be a guest designer for Stencil Sunday. I like to use stencils as the background of my cards. Today, I made three stencil background of cards by blending two colors of ink.

Card 1
Picked raspberry, Spiced marmalade Distress Oxide inks, Memento Tuexdo Black ink

To make the background, I fixed a white card stock with masking tape, and the inner part of the flower was blended with orange and the outer part of the flower pink. The two colors were blended repeatedly in the overlapping part to blend naturally.


Card 2

Peacock feathers, Salty ocean Distress Oxide inks , Memento Tuexdo Black ink

I really wanted to make a plaid with this stencil. The stencil was fixed with masking tape, blended with peacock feather ink, and then rotated 90 degrees to blend with salty ocean ink. I stamped Floral Bliss clear stamp and colored with Prisma color pencils and I fussy cut the flowers with my Cutter Bee scissors.


Card3 

Fossilized amber, Spiced marmalade Distress Oxide inks, Memento Tuexdo Black ink

I put the stencil horizontally long and cover both sides with masking tape so that only two lines are blended, and then I blended one line is yellow and one line is orange. After blending both lines, the masking tape was removed, and the masking tape was attached so that only the next two lines could be colored. And then I blended them in the same way.


I think the beautiful shape of the stencil and the bright color of the distress ink created a beautiful background. I hope it has given you a good inspiration for creating backgrounds with stencils. Thank you so much for stopping by! Happy crafting!